Dry fire practice means training with an unloaded firearm to build trigger control, sight alignment, and presentation without spending a single round. The NRA Family recommends sessions of about 10 to 15 minutes, three to four times a week, and that small time investment compounds into noticeably steadier hands at the range.
TL;DR:
- Keep live ammunition in another room, verify the chamber and bore visually and physically twice, and train toward a backstop capable of stopping a round.
- Use snap caps with rimfire firearms because repeated dry firing can damage some firing pins, and avoid snapping certain older actions without caps.
- Practice for 10 to 15 minutes three or four times weekly, then schedule live fire every one to two weeks to check recoil management.
- Build trigger control and presentation first; add draws only after the movement is clean, then introduce reloads, target transitions, and timed practice as skills improve.
Table of Contents
- A Quick Pre-Session Safety Checklist
- Setting Up a Safe Dry Fire Space
- Core Dry Fire Drills That Actually Build Skill
- A Sample Progressive Practice Plan
- Choosing Training Aids Without Overspending
- What We See Beginners Get Wrong in Class
- Why Dry Fire Deserves a Permanent Spot in Your Routine
- Train With Us When You’re Ready to Validate Your Skills
- FAQ
- Sources
A Quick Pre-Session Safety Checklist
Before you touch your firearm for a dry fire session, run through a short checklist every single time, no exceptions. This habit catches the mistakes that cause accidents long before they happen.
- Move all live ammunition, including loaded magazines, to a separate room.
- Check the chamber, mag well, and bore visually and physically, more than once.
- Pick a backstop that would stop a round, and keep eye protection on.
- Use snap caps or dummy rounds that look and feel clearly different from live ammo.
- Tell anyone in the house that you’re training, and silence your phone.
Pro Tip: Keep a dedicated “dry fire only” drawer or shelf for your snap caps and training gear so you never confuse them with live rounds.
Setting Up a Safe Dry Fire Space
The single most important rule in dry fire practice is physical separation: live ammunition does not belong in the same room where you train. Put magazines, speed loaders, and boxed rounds behind a closed door, in another part of the house, before you pick up your firearm.
Once the room is clear, verify the firearm itself is empty using a repeatable sequence:
- Point the muzzle in a safe direction and remove the magazine.
- Rack the slide or open the cylinder and visually inspect the chamber.
- Physically feel inside the chamber if lighting is poor.
- Rack the slide again and check a second time before you start.
This repeated-check habit is exactly what experienced instructors build into their own routines, according to NRA Family’s dry fire guidance, which treats double and triple verification as standard practice rather than overkill.
Pick your backstop with the same care you’d use at a range. A basement with a concrete wall, a garage with a heavy equipment backdrop, or an outdoor spot with a dirt berm all work better than a living room with drywall and a window behind your target. If you’re using a floor safe or heavy cabinet as part of your setup and need to relocate one, moving specialists like Orange Movers handle gun safes and cabinets without damaging the unit or your floors.
Rimfire pistols and revolvers deserve extra caution. Repeated dry firing without a buffer can damage the firing pin on some rimfire designs, so the SSUSA’s guide to dry firing recommends snap caps for these guns, and skipping snapping certain older actions altogether when caps aren’t available. Centerfire pistols and modern rifles are generally more forgiving, but snap caps still protect your gear and let you practice reloads realistically.
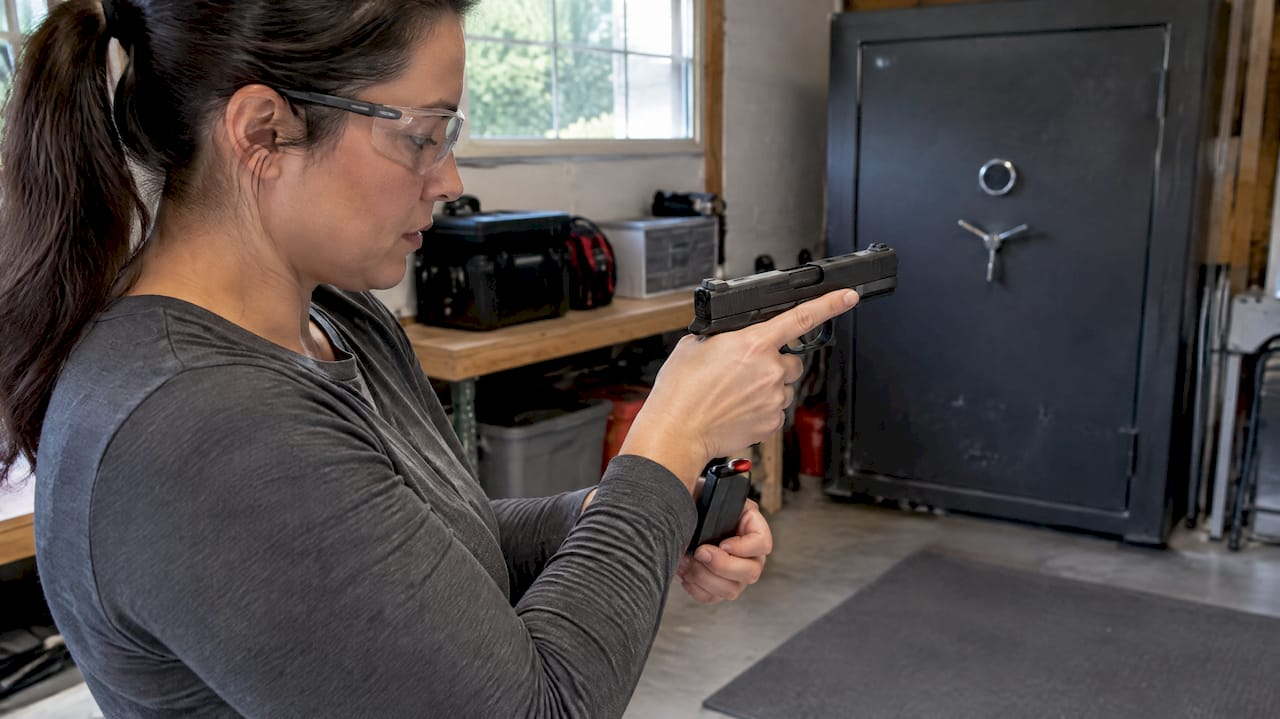
Eye protection stays on throughout, and the NSSF’s firearm safety rules are worth treating as background noise you never turn off: every gun is loaded until you’ve verified otherwise, and the muzzle never points anywhere you aren’t willing to destroy.
Core Dry Fire Drills That Actually Build Skill
Dry fire earns its reputation because it isolates the fundamentals that live fire tends to mask with recoil and noise. Here’s a drill progression that covers the skills most shooters actually need.
- Trigger control: focus on the front sight, press straight back until the shot breaks as a surprise, then practice feeling the reset without losing sight alignment.
- Presentation from low-ready: start with the gun lowered, bring it up to your sight picture smoothly, and press the trigger only when the sights settle.
- Holster draws: practice the muzzle path and finger discipline slowly first, then layer in timing once the motion is clean, a sequencing Shooting Illustrated recommends specifically to avoid building unsafe shortcuts.
- Sight acquisition: alternate between iron sights and a red dot if you carry one, since dot shooters need extra repetitions to make acquisition reflexive, per MGS Trade School’s drill breakdown.
- Reload drills: using dummy rounds, practice dropping a spent magazine and seating a fresh one without looking down at your hands.
- Malfunction clearing: rack the slide to simulate a stovepipe or failure to feed, then clear it the same way you would under stress.
Pro Tip: Film a few reps on your phone every couple of weeks. Watching your own grip and muzzle discipline catches flaws that are hard to feel in the moment.
Track your progress with something as simple as a notebook: log reps, drill type, and how clean each run felt. Competitive shooters lean hard on this kind of repetition because dry fire lets them rack up far more quality reps than live fire allows in the same amount of time, according to MGS Trade School, which notes that dry practice is especially effective for building the unconscious competence behind fast dot acquisition and transitions.
A Sample Progressive Practice Plan
A plan beats random repetition, and a progressive structure keeps you improving instead of plateauing.
- Beginner (weeks 1 to 2): 10 to 15 minutes per session, three to four times weekly. Warm up with grip and stance checks, run two focused drills (trigger press and presentation), then cool down with slow reps to end clean.
- Intermediate (weeks 3 to 6): add transitions between targets, introduce a shot timer for short strings, and work reload drills into every other session.
- Advanced (week 7 and beyond): layer in movement, stress drills like controlled breathing before the press, and red-dot transitions if you shoot an optic.
Suggested cadence: three to four short dry fire sessions a week, with one live-fire trip every one to two weeks to validate what you’ve built. Dry fire sharpens mechanics, but it can’t fully replace live fire for managing recoil, so the two need to work together rather than as substitutes, a point MGS Trade School makes when describing how competitive shooters pair heavy dry-fire volume with periodic live rounds. A simple log, whether paper or an app, keeps you honest about frequency and shows you which drills are actually moving the needle.
Choosing Training Aids Without Overspending
You don’t need a bag full of gadgets to dry fire effectively, but a couple of well-chosen tools can sharpen feedback.
- Laser chamber inserts flash a dot where your round would hit, instantly showing trigger-press flinches or muzzle dip.
- Snap caps or dummy rounds protect your firing pin and let you run realistic reload drills, a practice the SSUSA specifically recommends for rimfire guns.
- Dedicated training pistols (SIRT-style) offer reset feedback and a laser built in, though they cost more and only mimic one platform at a time.
- Shot timers or phone apps record your draw and split times so you can see numbers improve instead of just feeling like you’re getting faster.
Treating dry fire like deliberate practice, the way an athlete approaches strength work, is what separates shooters who improve from those who just rack the slide a few times a week, according to the SSUSA’s axioms of dry-fire training, which frames structured repetition as the real driver of skill gains.
Pick one aid that addresses your weakest link, whether that’s trigger press or reload speed, and build it into the plan above rather than buying everything at once.
What We See Beginners Get Wrong in Class
Beginners typically rush the fundamentals before their grip and stance are consistent, and we see the same handful of errors over and over in our sessions.
- Gripping too loosely, which lets the muzzle dip right as the trigger breaks.
- Anticipating the “shot” and pushing down a split second before the dry fire click.
- Skipping the clearance check because “I just checked it a minute ago.”
- Practicing draws too fast before the motion itself is clean and repeatable.
For students with mobility or vision limits, we adjust stance requirements and rely more on tactile grip cues than visual sight alignment, building drills around what each student can feel and control. In our own classes, we open live-fire sessions with a short dry-fire warm-up to reset grip and trigger press before anyone loads a magazine, which carries directly into the drills above.
Why Dry Fire Deserves a Permanent Spot in Your Routine
Dry fire practice is the cheapest, most repeatable way to multiply the value of limited range time, and treating it as an afterthought is the biggest mistake I see shooters make. Ten focused minutes a few times a week will do more for your trigger control than an occasional range trip ever will on its own.
Keep your expectations grounded, though. Dry fire builds mechanics, not recoil management, so pair it with live fire on a reasonable cadence rather than treating it as a full replacement. If a drill feels off and you can’t tell why, that’s the moment to book time with an instructor rather than guessing your way through another month of reps.
— Dee Parker
Train With Us When You’re Ready to Validate Your Skills
Dry fire practice builds the foundation, but nothing confirms good habits like range time with a certified instructor watching your grip, stance, and trigger press in real time. We offer private firearm training in Fairfax, VA, built around exactly this kind of one-on-one feedback, along with red dot pistol training for shooters working on dot acquisition and transitions.

If you’re working toward a carry permit, our DMV Concealed Carry Training Package covers the certification side alongside hands-on instruction. In a session with us, expect:
- A grip and stance check before any live rounds are fired.
- Direct feedback on trigger press and sight alignment.
- A clear next step, whether that’s more dry fire homework or moving on to timed drills.
Reach out through our concealed carry training page to book a class or a private lesson and put your practice to the test with an instructor beside you.
FAQ
What is dry fire training?
Dry fire training means practicing with an unloaded firearm to work on fundamentals like trigger control, sight alignment, and presentation. It’s a safe way to build muscle memory without spending ammunition, according to NRA Family.
How often should you dry fire practice?
A common recommendation is 10 to 15 minutes per session, three to four times a week, per NRA Family’s guidance. Consistency matters more than long sessions, so short, frequent practice beats one long session a month.
How do I practice dry firing at home?
Start by removing all live ammunition from the room, then verify your firearm is empty using multiple visual and physical checks. Pick a safe backstop, use snap caps for realistic reload practice, and run focused drills like trigger press, presentation, and sight acquisition for 10 to 15 minutes.
Is dry fire training worth it?
Yes. Competitive shooters rely on high-volume dry fire specifically because it allows far more quality repetitions than live fire in the same amount of time, especially for skills like dot acquisition and transitions, according to MGS Trade School. It won’t replace live fire for recoil management, but it sharpens the mechanics that live fire alone often can’t isolate.
Sources
- How to dry-fire your gun safely | NRA Family
- SSUSA Q&A: What Is Dry-Firing?
- Why competitive shooters use dry fire training – MGS Trade School