
Most handgun malfunctions fit a small set of failure types: failure to feed, failure to eject, double feed, failure to fire in its several forms, and squib loads. When one happens, the single most important move is to keep the muzzle pointed in a safe direction, treat the firearm as loaded, and follow the clearing steps appropriate to that specific problem.
TL;DR:
- Most malfunctions stem from magazine issues, improper handling, or mechanical wear, often resolved by tap-rack or clearing procedures.
- Treat every malfunction as if the firearm is loaded and remain focused on safety rules until the gun is fully cleared.
- Double feeds require removing the magazine first, then fully locking the slide back to clear both rounds jammed together.
- A squib load is identified by a weak bang and no new hole in the target, requiring immediate stopping and bore inspection.
- Hands-on training with dummy rounds under expert supervision is essential to develop confidence and reaction speed during malfunctions.
Table of Contents
- Safety Rules You Follow Before Touching the Slide
- Failure to Feed: Recognizing and Clearing a Jam
- Stovepipes and Stuck Cases: Clearing an Extraction Failure
- Double Feed: Why This One Needs a Different Fix
- Misfires, Hangfires, and Light Primer Strikes
- Squib Loads: Stop Firing the Moment Something Feels Off
- What’s Really Causing Your Malfunctions
- Practicing Malfunction Clearing Without Live Ammunition
- Maintenance Habits That Cut Malfunctions Before They Start
- Why Supervised Training Beats Guesswork
- An Honest Take on Learning to Handle Jams
- Learn Malfunction Clearing Hands-On With Us
- FAQ
- Sources
Safety Rules You Follow Before Touching the Slide
Every malfunction response starts with the same four habits: muzzle pointed in a safe direction, trigger finger off the trigger, treating the gun as loaded, and staying sure of your target and what’s behind it. Those rules do not pause just because the gun failed to cycle the way you expected.
Any time a round fails to fire when you pull the trigger, you should handle it with care: keep your face away from the breech and open the action deliberately rather than yanking it open out of frustration.
- Keep the muzzle downrange or in a safe direction at all times.
- Keep your finger off the trigger while you diagnose the problem.
- Treat every malfunction as a loaded firearm, not a dud.
- Keep your face and body clear of the ejection port and breech.
A malfunction should be treated as a potential hangfire for at least 30 seconds before you open the action, since a delayed ignition can still fire after the trigger pull.
Failure to Feed: Recognizing and Clearing a Jam
A failure to feed shows up as a slide that will not close into battery, a round that chambers only partway, or a slide that hangs open with a cartridge caught at an angle. On a revolver, it looks different: the cylinder won’t rotate freely or a round sits proud of the cylinder face.
- Keep the muzzle pointed safely and remove the magazine.
- Rack the slide firmly to clear the obstructed round, then inspect the chamber.
- Reload a fresh, properly seated magazine and chamber a new round.
- For a revolver, open the cylinder and manually clear the offending case or cartridge.
This tap-rack-roll sequence, confirm the magazine is seated, rack the slide, and resume, resolves the large majority of feed issues in semi-automatics. Common causes include a weak or dirty magazine spring, damaged feed lips, limp wristing (not holding the gun firmly enough to let the slide cycle fully), or ammunition that is the wrong length for the chamber.
Pro Tip: Slap the base of the magazine upward before racking the slide; a magazine that looks seated is sometimes sitting just low enough to cause the jam.
Stovepipes and Stuck Cases: Clearing an Extraction Failure
A stovepipe is easy to spot: a spent case gets caught upright in the ejection port, pinned by the slide instead of flying clear. A stuck case that won’t extract at all is a closer cousin and feels like the slide is locked partially open with resistance.
- Keep the muzzle in a safe direction and lock the slide to the rear if you can.
- Remove the magazine before you touch the stuck case, so you don’t push another round into the mess.
- Sweep or pluck the case free with your fingers, then reinsert the magazine and rack the slide to chamber a fresh round.
- Inspect the empty case for deformation once it’s clear; a bulged or torn case rim points to a bigger problem.
Repeated stuck cases, a case that shears or stays lodged no matter what you try, or an extractor that visibly fails to grab the rim are signs the extractor or its spring needs a gunsmith’s attention rather than another round of force.
Double Feed: Why This One Needs a Different Fix
A double feed looks similar to a failure to feed at first glance, but the giveaway is two rounds jammed together: one partially chambered and a second nose-to-tail behind it, trying to feed from the magazine at the same time. Racking the slide the way you would for a simple jam usually makes it worse, because there’s nowhere for the second round to go.
- Remove the magazine first; this is the step most people skip under stress.
- Pull the slide fully to the rear and lock it open to extract the chambered round.
- Tilt the gun and shake or sweep out the stuck cartridge from the magazine well.
- Reinsert a magazine and rack the slide to chamber a new round before continuing.
Once you’re back up and running, it’s worth a few minutes with dummy rounds to confirm the magazine is feeding cleanly and that the feed lips aren’t bent or worn, since a double feed often traces back to magazine wear rather than the gun itself.
Misfires, Hangfires, and Light Primer Strikes
A misfire is any failure to fire on a normal trigger pull. The reason this category gets its own set of rules is that you cannot tell, by looking at it, whether you have a true dud, a hangfire (delayed ignition that can still go off), or a light primer strike (the firing pin touched the primer but didn’t ignite it).
- Keep the muzzle pointed safely the instant the gun fails to fire.
- Wait before opening the action, since a hangfire can detonate after the trigger pull.
- Open the action carefully, face away from the breech, and eject the questionable round.
- Set the ejected round aside and inspect it rather than rechambering it immediately.
Any failure to fire should be treated as a potential hangfire for at least 30 seconds with the muzzle held safely downrange before you open the action, a simple habit that covers you whether the cause turns out to be a hangfire or something else entirely.
If the primer shows a light or off-center strike, stop using that batch of ammunition and have the firing pin, striker, and spring checked. Repeated light strikes point to a mechanical issue, not bad luck.
Squib Loads: Stop Firing the Moment Something Feels Off
A squib load is the one malfunction that genuinely calls for you to stop shooting for the day, not just clear it and continue. The telltale signs are a noticeably weaker bang, lighter recoil than normal, a sluggish or failed cycle, and no new hole in the target. A squib produces reduced recoil and a muffled report, the clearest warning that a bullet may be lodged in the bore rather than downrange.
- Cease fire immediately and keep the muzzle pointed in a safe direction.
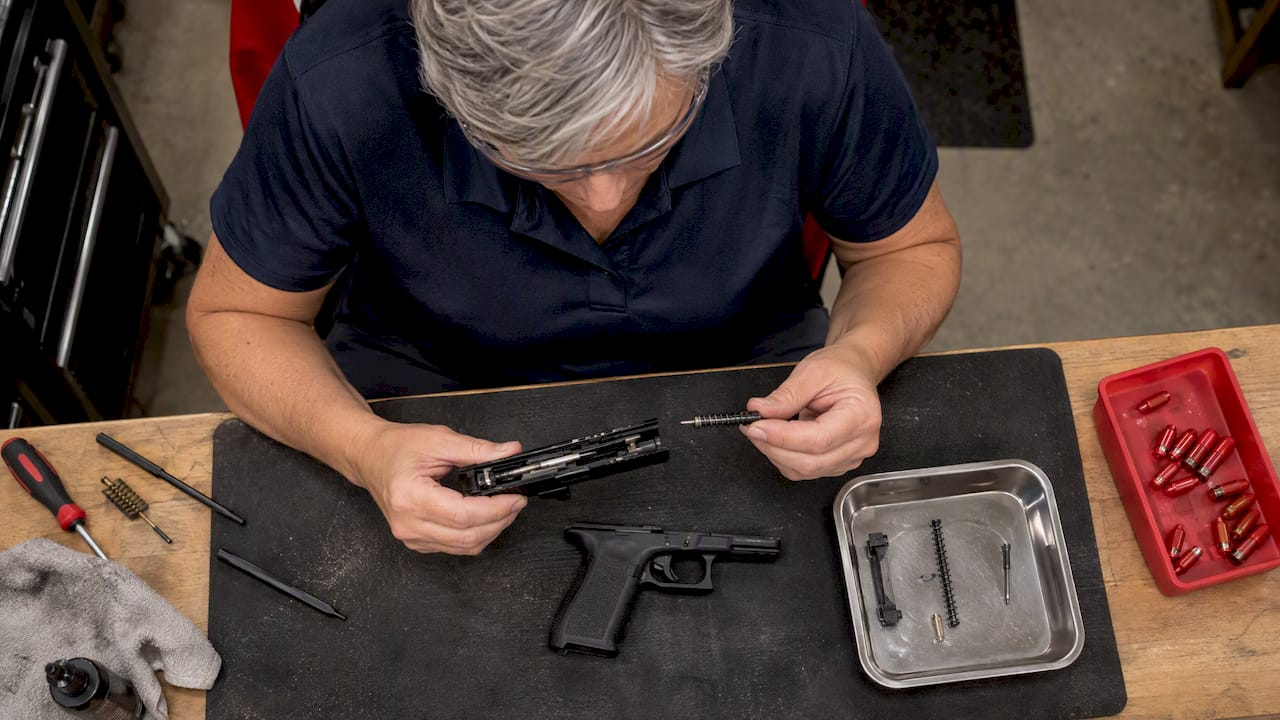
- Unload the firearm completely and visually check the chamber and bore for an obstruction.
- If you see a bullet or obstruction, remove it with a cleaning rod or dowel from the correct end, supporting the barrel and never forcing it.
- If the obstruction won’t move easily, or you’re not sure, stop and take the firearm to a gunsmith rather than risk driving it further or firing again.
Firing a second round into an obstructed barrel can destroy the firearm and injure the shooter, so this is never a “try it once more” situation.
What’s Really Causing Your Malfunctions
Most recurring malfunctions trace back to one of three buckets: bad ammunition, mechanical wear, or handling habits. Ammunition that’s been stored poorly, exposed to heat, humidity, or solvents, is a common culprit; environmental exposure can damage ammunition and cause failures to fire, delayed ignition, or altered pressure, which is why inspecting rounds before loading them matters.
- Check ammunition for corrosion, dents, or discoloration before you load it.
- Inspect magazines for bent feed lips, weak springs, or debris.
- Wipe down the feed ramp and chamber during routine cleaning.
- Run a few dummy rounds through the gun after cleaning to confirm smooth feeding.
Ammunition that was exposed to fire or extreme heat carries its own risk, since SAAMI’s guidance on heat-exposed ammunition warns that components can degrade and pressures can change in ways you can’t see from the outside. If a single magazine keeps causing problems, replace it rather than nursing it along, and if failures keep recurring after you’ve ruled out ammo and magazines, have an armorer check the extractor and recoil spring.
Pro Tip: Keep one magazine dedicated to dummy-round practice so you never accidentally mix inert rounds into a carry magazine.
Practicing Malfunction Clearing Without Live Ammunition
You build the right reflexes the same way you build any other physical skill: repetition under realistic, low-risk conditions. Because handgun designs vary, model-specific handling and clearing procedures matter, and a sequence that works on one pistol may feel different on another.
- Load a magazine with a mix of dummy rounds or snap caps and live rounds (under supervision only) so malfunctions occur unpredictably.
- Practice the tap-rack-roll sequence until it’s automatic, then move to double-feed drills with the slide locked fully rearward.
- Run squib-recognition drills dry, noticing the feel of a normal cycle versus a sluggish one.
- Keep a bore flag, cleaning rod, and inert dummy rounds in your range bag and repeat drills every few months, not just once.
Practicing clearances with inert training cartridges under instructor supervision is the reliable way to avoid panic errors when a real malfunction happens under stress. A training calendar with scheduled range time gives you a structured place to repeat these drills rather than guessing at home.
Maintenance Habits That Cut Malfunctions Before They Start
Prevention is less about any single trick and more about consistency: clean ammunition, clean gun, and magazines that get checked instead of ignored.
- Reject any round that looks corroded, dented, or discolored.
- Store ammunition in a cool, dry place, away from solvents and direct heat.
- Clean and lubricate the firearm on a regular schedule, not just after it malfunctions.
- Inspect and rotate magazines, retiring any with weak springs or bent feed lips.
- Avoid repeatedly rechambering the same round, which can set the bullet deeper and raise pressure.
SAAMI’s storage guidance recommends keeping ammunition in a cool, dry environment and inspecting it regularly, since damage from heat or moisture often isn’t visible until the round fails to perform as expected.
Why Supervised Training Beats Guesswork
Reading about tap-rack-roll is useful; doing it under an instructor’s eye, on your own handgun, is what actually sticks. An instructor catches the habit you don’t know you have, like flagging your own hand while clearing a stovepipe, before it becomes automatic.
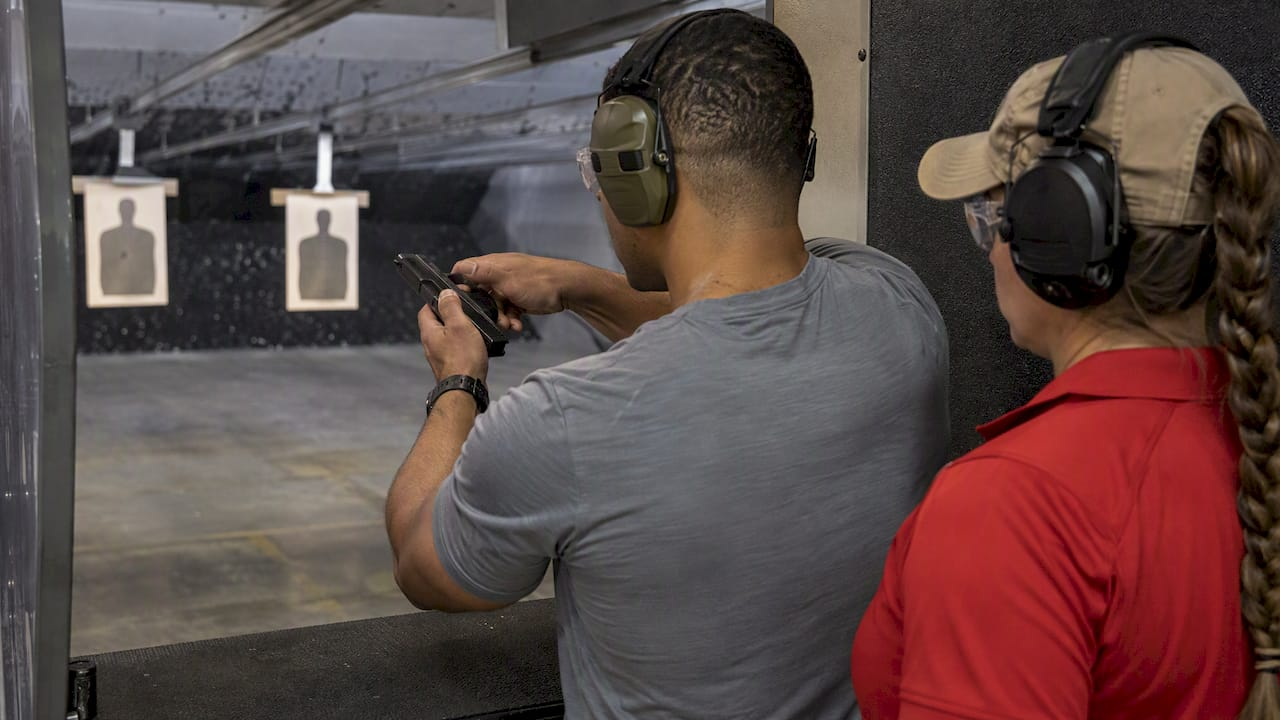
We built our classes around that kind of hands-on correction. Our certified instructors adapt malfunction drills to the specific handgun each student brings, whether that’s a first CCW class, a private lesson, or one of our adaptive or women’s training sessions. If your gun keeps jamming no matter what you try, that’s a sign to see a gunsmith; if you keep hesitating or freezing during a jam, that’s a sign to book range time with an instructor.
An Honest Take on Learning to Handle Jams
Malfunctions aren’t a sign you’re doing something wrong as a shooter. They happen to everyone who shoots enough rounds, and the shooters who handle them calmly are the ones who’ve rehearsed the moves, not the ones who got lucky. Confidence here comes from repetition, not from reading one more article.
The riskiest moment isn’t the malfunction itself, it’s the first time you try to clear one without ever having practiced it. Get that first rep in on a supervised range, not in the middle of a stressful situation where guessing costs you.
— Dee Parker
Learn Malfunction Clearing Hands-On With Us
Reading about tap-rack-roll only gets you so far. We give you a live handgun, an instructor at your shoulder, and the repetitions needed to make clearing a jam feel automatic instead of panicked.

Our DMV Concealed Carry Training Package covers real handling fundamentals alongside the permit requirements, and our private firearm training sessions let you work through malfunction drills on your own handgun at your own pace. We also offer adaptive training for individuals with disabilities and dedicated women’s firearms training, so the instruction fits the student rather than the other way around. If you carry for personal protection, our team can walk you through how local laws, like those around improper exhibition of a firearm, intersect with handling a loaded gun safely. Check our training calendar and book a class with us this week.
FAQ
What is the most common handgun malfunction?
Failure to feed and stovepipe jams (failure to eject) are among the most frequently reported issues, often tied to magazine wear, limp wristing, or dirty feed ramps. Clearing either one usually takes just a few seconds once you know the tap-rack-roll sequence.
How do I know if I have a double feed instead of a simple jam?
A double feed shows two rounds jammed together, one partially chambered and a second stacked behind it from the magazine, while a simple failure to feed involves only one round. Removing the magazine first and racking the slide fully rearward is the safer fix for a double feed.
What should I do if my gun doesn’t fire when I pull the trigger?
Treat it as a potential hangfire and keep the muzzle pointed safely for at least 30 seconds before opening the action. Only after that pause should you eject the round and inspect it.
How can I tell if I fired a squib load?
A squib produces a noticeably weaker sound and lighter recoil than a normal shot, sometimes paired with a failure to cycle or no new hole in the target. Stop firing immediately and check the bore for an obstruction before loading another round.
Can I learn to clear malfunctions on my own, or do I need a class?
You can learn the basic steps from guidance like this, but building a reliable, panic-proof response works best through supervised practice with dummy rounds under an instructor’s guidance. We offer private lessons and group classes built specifically around that kind of hands-on repetition.
Sources
- What Are The Differences Between A Squib Load, A Misfire And A Hangfire? | An NRA Shooting Sports Journal
- SAAMI Recommendations for Safe Ammunition Storage and Handling