
Appendix carry can be used safely, but only by carriers who commit to a holster that fully covers the trigger guard and who treat every reholster as a slow, deliberate act rather than a reflex. The position rewards discipline and punishes shortcuts. Range and agency rules vary, so check local policy before you train.
TL;DR:
- Proper holster choice with full coverage over the trigger guard is essential to minimize accidental discharges during appendix carry.
- Reholstering should always be slow and deliberate, with a focus on confirming the need to reholster and keeping the finger away from the trigger.
- The muzzle points toward the femoral artery and pelvis, making injuries potentially fatal if a negligent discharge occurs during draw or reholstering.
- Training should prioritize trigger discipline, gear fit, and deliberate practice before increasing speed or complexity in real scenarios.
- Adequate storage, body mechanics, and first aid knowledge are critical to handle injuries safely and reduce household risks associated with appendix carry.
Table of Contents
- Weighing the pros and cons of appendix carry
- Anatomy of the risks: muzzle direction, reholstering, and human-factor chains
- Holster, belt, and apparel: gear that lowers appendix carry risk
- Safe drawing and reholstering: a step-by-step practice sequence
- Training, supervised practice, and agency policies
- Storage, transport, and household risk reduction
- Physical fitness and body mechanics that reduce injury risk
- Medical considerations and first aid for appendix carry injuries
- Legal implications and self-defense laws tied to appendix carry
- A trainer’s view on where appendix carry goes wrong
- Train the habit with Trouble Defense
- Sources
- FAQ
Weighing the pros and cons of appendix carry
Appendix inside the waistband carry, usually called AIWB, puts the holster near the front centerline of the body, typically between the hip bones. People choose it because the draw stroke is short and repeatable, it conceals well under closed-front shirts and jackets, and the grip sits in a consistent, easy-to-find spot. Those advantages come with real trade-offs.
- Muzzle direction: the barrel points toward the groin and upper thigh, an area with major blood vessels close to the surface.
- Comfort: sitting for long stretches, driving, or desk work can make AIWB uncomfortable compared to a hip or rear position.
- Fit sensitivity: the wrong holster, belt, or body type turns a good concept into a daily irritation or a safety liability.
Carriers with an athletic build, an active job, and mostly standing or moving duties tend to do well with AIWB. Someone who sits for eight hours a day, has significant abdominal weight, or works a job requiring frequent bending may find another position more practical.
Anatomy of the risks: muzzle direction, reholstering, and human-factor chains
Muzzle direction matters because a discharge while drawing or reholstering an AIWB firearm sends the bullet toward the femoral artery and pelvis, an injury pattern that can be fatal within minutes if untreated. That is the “high consequence” part of the equation: the position does not raise the odds of a mistake, but it raises the cost of one.
Reholstering is the moment most negligent discharges happen, not the draw itself. A carrier under time pressure, distracted by a phone or a bystander, or fighting a stiff cover garment can let the trigger finger drift back onto the trigger while forcing the gun into a holster that has partially collapsed. A scoping review of involuntary firearms discharges found that these incidents typically come from a chain of stacked conditions rather than one isolated error: stress, divided attention, awkward body position, and sequencing mistakes combine before the finger ever touches the trigger.
One documented risk factor: some holster retention designs place the trigger finger near the release mechanism during reholstering, which the FLETC holster study links to negligent discharge incidents in training environments. That single design detail has led some agencies to prohibit those holsters outright.
Holster, belt, and apparel: gear that lowers appendix carry risk
Gear choice is not cosmetic here. It is the largest lever a carrier controls.
- Holster: buy model-specific, rigid, and full coverage over the trigger guard. Skip universal pouches that flex or gap near the trigger.
- Holster mouth: the opening should stay rigid and open when the gun is out, so you can reholster without prying the material apart with your finger.
- Belt: a stiff, purpose-built gun belt keeps ride height, cant, and wedge or wing angle consistent. A soft dress belt lets the holster tilt, which rotates the muzzle unpredictably.
- Apparel: closed-front shirts and jackets conceal AIWB well. Lift the garment with your support hand, not your trigger hand, and avoid drawstrings or loose undershirts that can snag the grip mid-draw.
The NRA’s concealed carry primer treats the belt as part of the holster system for exactly this reason: a flexible belt undermines an otherwise sound rig by letting it sag or shift during normal movement. For readers comparing construction types, a partner guide to hybrid holsters breaks down how hybrid designs balance rigidity and comfort, and our own guide to holsters for first-time carriers covers fit basics for AIWB specifically.
Pro Tip: If your holster mouth collapses when the gun is out, retire it. A holster that needs two hands to reopen is a holster that will eventually meet your trigger finger.
Safe drawing and reholstering: a step-by-step practice sequence
Build the habit in this order, every time, until it is automatic.
- Establish a firm grip on the holstered pistol before you move the gun at all.
- Clear the cover garment with your support hand, sweeping it up and out of the draw path.
- Draw straight up until the muzzle clears the holster, then rotate it toward the target.
- Place your trigger finger on the frame, outside the trigger guard, until your sights are on target and you have made the decision to fire.
Reholstering reverses that discipline with even more care.
- Stop and confirm you actually need to reholster, rather than rushing because a moment feels over.
- Remove your finger from the trigger and index it on the frame.
- Clear the garment fully with your support hand and keep that hand away from the muzzle’s path the entire time.
- Look at the holster opening if possible, and insert the pistol slowly.
- Abort and restart if you feel any resistance instead of forcing it.
This sequence follows the reholstering checklist in the NRA’s guidance on drawing from concealment, which treats every reholster as a deliberate, almost reluctant action rather than a reflex.
Pro Tip: Practice this entire sequence with an unloaded firearm, dozens of times, before you ever add speed. Speed comes from repetition, not urgency.
Training, supervised practice, and agency policies
Instructors and range operators expect specific behaviors before they consider a carrier ready for faster work: trigger-finger discipline outside the guard until the decision to fire, a holster that retains the gun through normal movement, and reholsters slow enough to catch a problem before it becomes an incident. Some ranges and agencies restrict or prohibit AIWB entirely, so check house rules before you show up with that setup.
- Instructors watch for consistent trigger-finger placement across dozens of repetitions, not just the good ones.
- Holster and belt compatibility gets checked before live fire, not after a problem shows up.
- Reholstering speed only increases once slow reholsters are clean and repeatable.
Training is often structured around that same order: dry practice first, then supervised live fire, with holster and gear fit addressed before speed. The holster draw training class is built specifically around this draw and reholster sequencing.
Storage, transport, and household risk reduction
Appendix carry safety does not end when the holster comes off. Secure storage matters just as much for the rest of the household.
- At home: store the unloaded firearm locked, with ammunition kept separately, when it is not on your body.
- In the vehicle: use a mounted lock box or secured compartment rather than leaving it in a glove box or console.
- With family: talk through your storage plan with everyone in the house, and use a cable or trigger lock as a backup layer.
Unlocked, loaded storage is linked to a higher share of unintentional firearm deaths among children, according to a CDC analysis of unintentional firearm injury deaths, which found most of these incidents happen at home. Secure storage, meaning locked, unloaded, and separated from ammunition, is the mitigation the data points to.
Physical fitness and body mechanics that reduce injury risk
Appendix carry asks more of your core and hips than a hip holster does, because the gun rides where your body bends. Carriers who sit for long periods without adjusting posture put steady pressure on the same spot, which can cause chafing, nerve irritation, or a habit of leaning back to relieve pressure, itself a postural problem.
A few adjustments help. Building core strength through basic conditioning gives your midsection more tolerance for a rigid holster pressed against it all day. Practicing hip hinges instead of spinal flexion when you bend over, picking something off the floor for instance, keeps the muzzle direction more predictable and reduces the odds of the holster digging in awkwardly. Adjusting ride height and cant to match your body shape, rather than copying a setup that works for someone with a different frame, solves most of the comfort complaints that lead people to abandon AIWB. Standing and moving periodically during a seated workday also reduces both discomfort and the temptation to loosen the belt, which reintroduces tilt.
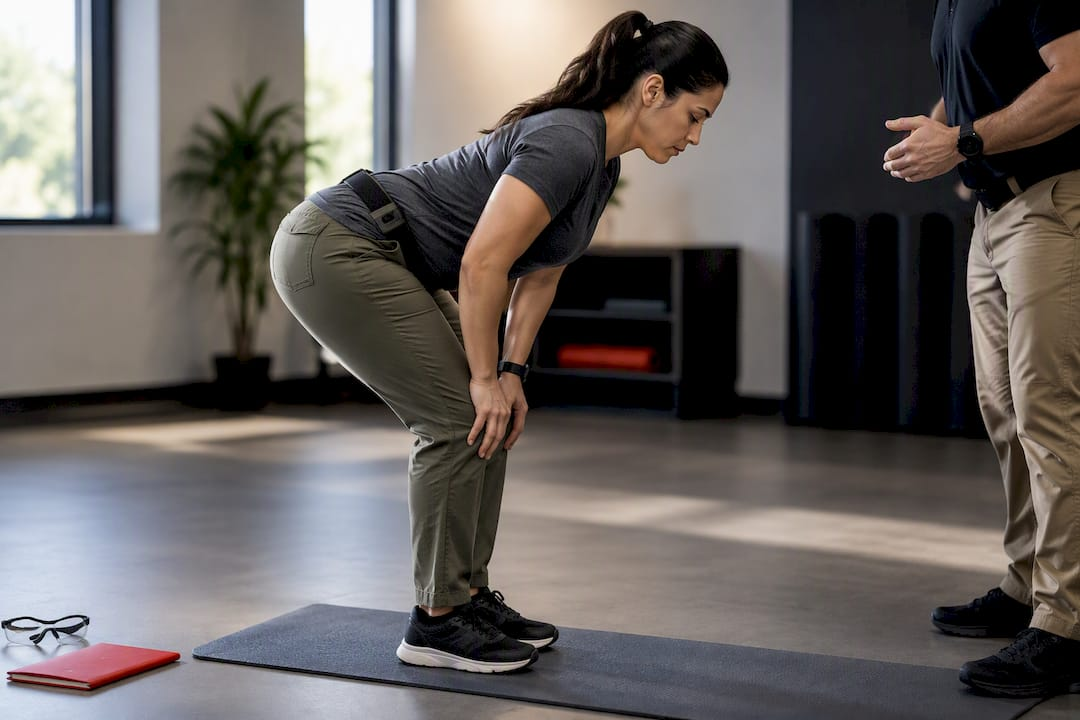
None of this is about becoming an athlete. It is about recognizing that a rigid object worn at the front of your body interacts with how you move, sit, and bend, and that a few mechanical habits prevent most of the physical complaints tied to the position.
Medical considerations and first aid for appendix carry injuries
The reason appendix carry draws so much safety attention is anatomical: the femoral artery and surrounding vessels sit close to the surface in the area the muzzle points toward during a draw or reholster. An injury there can cause rapid blood loss, and response time matters more than with many other wound locations.
Carriers who choose AIWB should know basic hemorrhage control before they need it: applying direct pressure, packing a wound with gauze, and using a tourniquet placed high and tight above the injury site if bleeding is severe and pressure alone is not controlling it. A compact trauma kit that includes a tourniquet and pressure dressing is a reasonable addition to a range bag or vehicle, separate from any first aid kit meant for general cuts and scrapes. This is not a substitute for professional medical training, and a hands-on course from a qualified provider is the right way to build that skill rather than reading about it once.
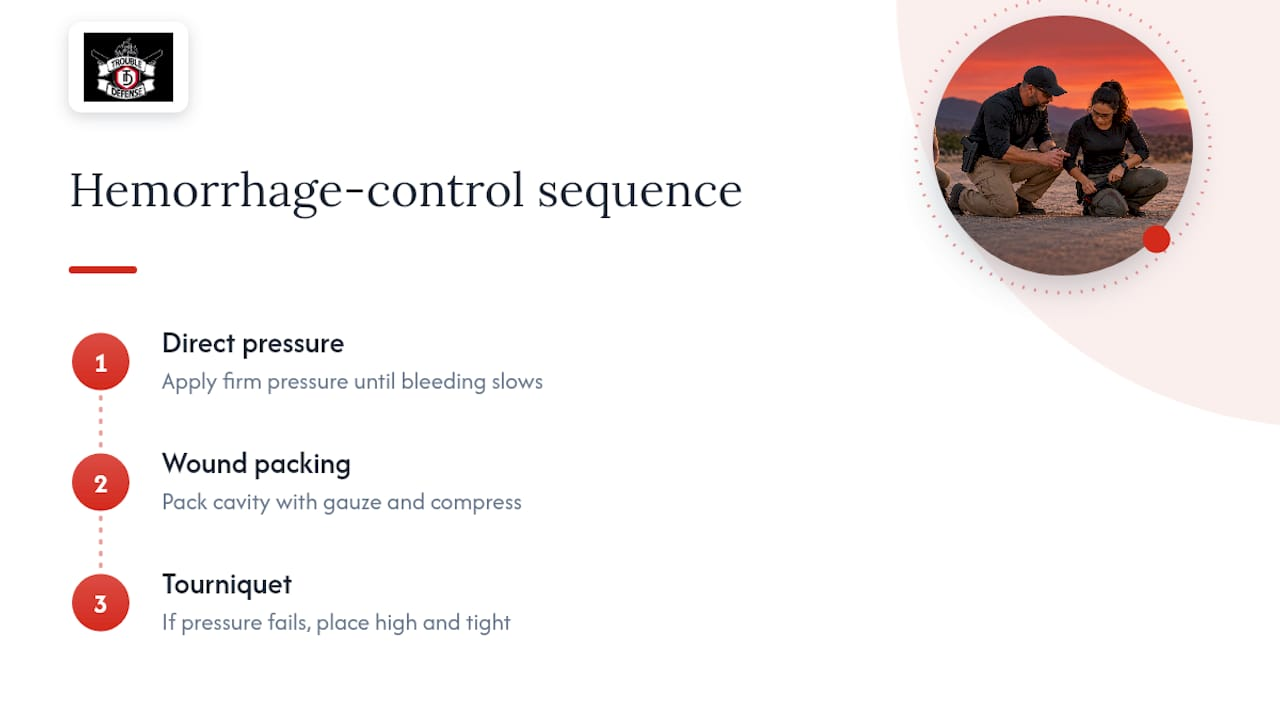
The goal of every safety practice covered earlier, holster selection, deliberate reholstering, dry practice, is to make this section unnecessary. Trauma preparedness is the backup plan, not the main one.
Legal implications and self-defense laws tied to appendix carry
Appendix carry itself is not treated differently under the law than any other concealed carry position. What matters legally is whether you are licensed to carry concealed in your state, whether you are complying with that state’s rules on where a concealed firearm can be carried, and whether any use of force meets that jurisdiction’s self-defense standard. A negligent discharge, however, can carry separate legal exposure, ranging from a reckless handling charge to civil liability if someone else is injured, regardless of which position you carry in.
Laws on concealed carry, permit reciprocity, and self-defense vary significantly by state and locality, and they change. Carriers should confirm current rules for their state and any state they travel through, since a permit valid at home is not automatically valid everywhere. A firearm safety and violations guide covers how safe handling practices intersect with legal and regulatory consequences in more detail, and a licensed attorney is the right resource for a specific legal question, not a blog article.
A trainer’s view on where appendix carry goes wrong
The mistakes we see most in early classes are not gear failures. They are sequencing failures: a student’s trigger finger creeps back toward the guard while reholstering under a hoodie that will not cooperate. That is a training gap, not a character flaw, and it closes fast with repetition.
Appendix carry is worth reconsidering if you have a job that keeps you seated most of the day, a medical condition that makes abdominal pressure painful, or a body type that no amount of belt and cant adjustment seems to fix. Comfort complaints that persist after proper fitting are data, not something to push through.
— Dee Parker
Train the habit with Trouble Defense

Reading about safe reholstering and practicing it under a qualified eye are different skills, and the gap between them is where most mistakes happen. Trouble Defense runs hands-on sessions that walk through exactly what this article covers: dry practice repetitions, supervised live-fire progression, and honest feedback on whether your holster and belt setup actually fits your body. Our DMV Concealed Carry Training Package builds this sequencing into the core curriculum, and our private firearm training option gives you one-on-one time to work through your specific gear and draw. Book a session and leave with habits you have actually practiced under supervision, not just read about.
Sources
- Drawing a pistol from concealment, part 2: re-holstering and apparel choices | NRAblog
- FLETC holster study (holster procedures and safety findings)
- CDC MMWR: Unintentional firearm injury deaths of children — analysis
- What triggers involuntary firearms discharges? – A scoping review
FAQ
Is appendix carry the safest carry position?
No single position is guaranteed safe; safety depends on holster quality, belt setup, and how disciplined the carrier is during draws and reholsters. Appendix carry offers a fast, consistent draw but raises the stakes if a mistake happens, since the muzzle points toward the femoral area during that motion.
What are the main risks of appendix carrying?
The core risks are muzzle direction toward the groin and upper thigh, and negligent discharges during reholstering caused by rushed movement or a holster that requires prying open. A scoping review of involuntary discharges found these incidents usually stem from combined stressors rather than one isolated mistake.
What is the safest handgun to appendix carry?
There is no single correct answer, but a handgun with a manageable size, a manual or long, heavy trigger pull, and controls that fit your hand tends to pair well with AIWB. Our guide to choosing a concealed carry handgun walks through the fit and control factors that matter most for this position.
What does “Mexican carry” mean?
“Mexican carry” refers to carrying a firearm in the waistband without any holster at all, relying only on clothing to hold it in place. Trainers generally advise against it because there is nothing covering the trigger guard, which removes the main safeguard against an accidental trigger contact during normal movement.
How do I practice appendix carry safely before going live?
Start with dry practice using an unloaded firearm, running the draw and reholster sequence slowly until trigger-finger discipline is automatic. Move to supervised, slow-motion live fire with a qualified instructor before adding any speed, following the progression outlined in minimum firearms training standards.